

Bootable USB image available
Written by xet7 on 2018-06-16.
Bootable USB image available
xet7 released today bootable USB image version of TSC. It has Debian 9 64bit Linux with LXDE desktop and TSC alpha version installed from git repo devel branch as of today 2018-06-16. Linux boots directly from USB stick, so it works fast and is very playable.
ChangeLog
- v0.02 2018-06-17 Added wlan drivers, and some graphics/audio/password etc software
- v0.01 2018-06-16 First release
Longplay 1.5 hour video of TSC
1) Requirements
You most likely need bigger that 8 GB USB stick, because usb image if from 8 GB USB stick. This is because some 8 GB USB sticks are a little smaller, and some are bigger. You can try does this fit on 8 GB USB stick.
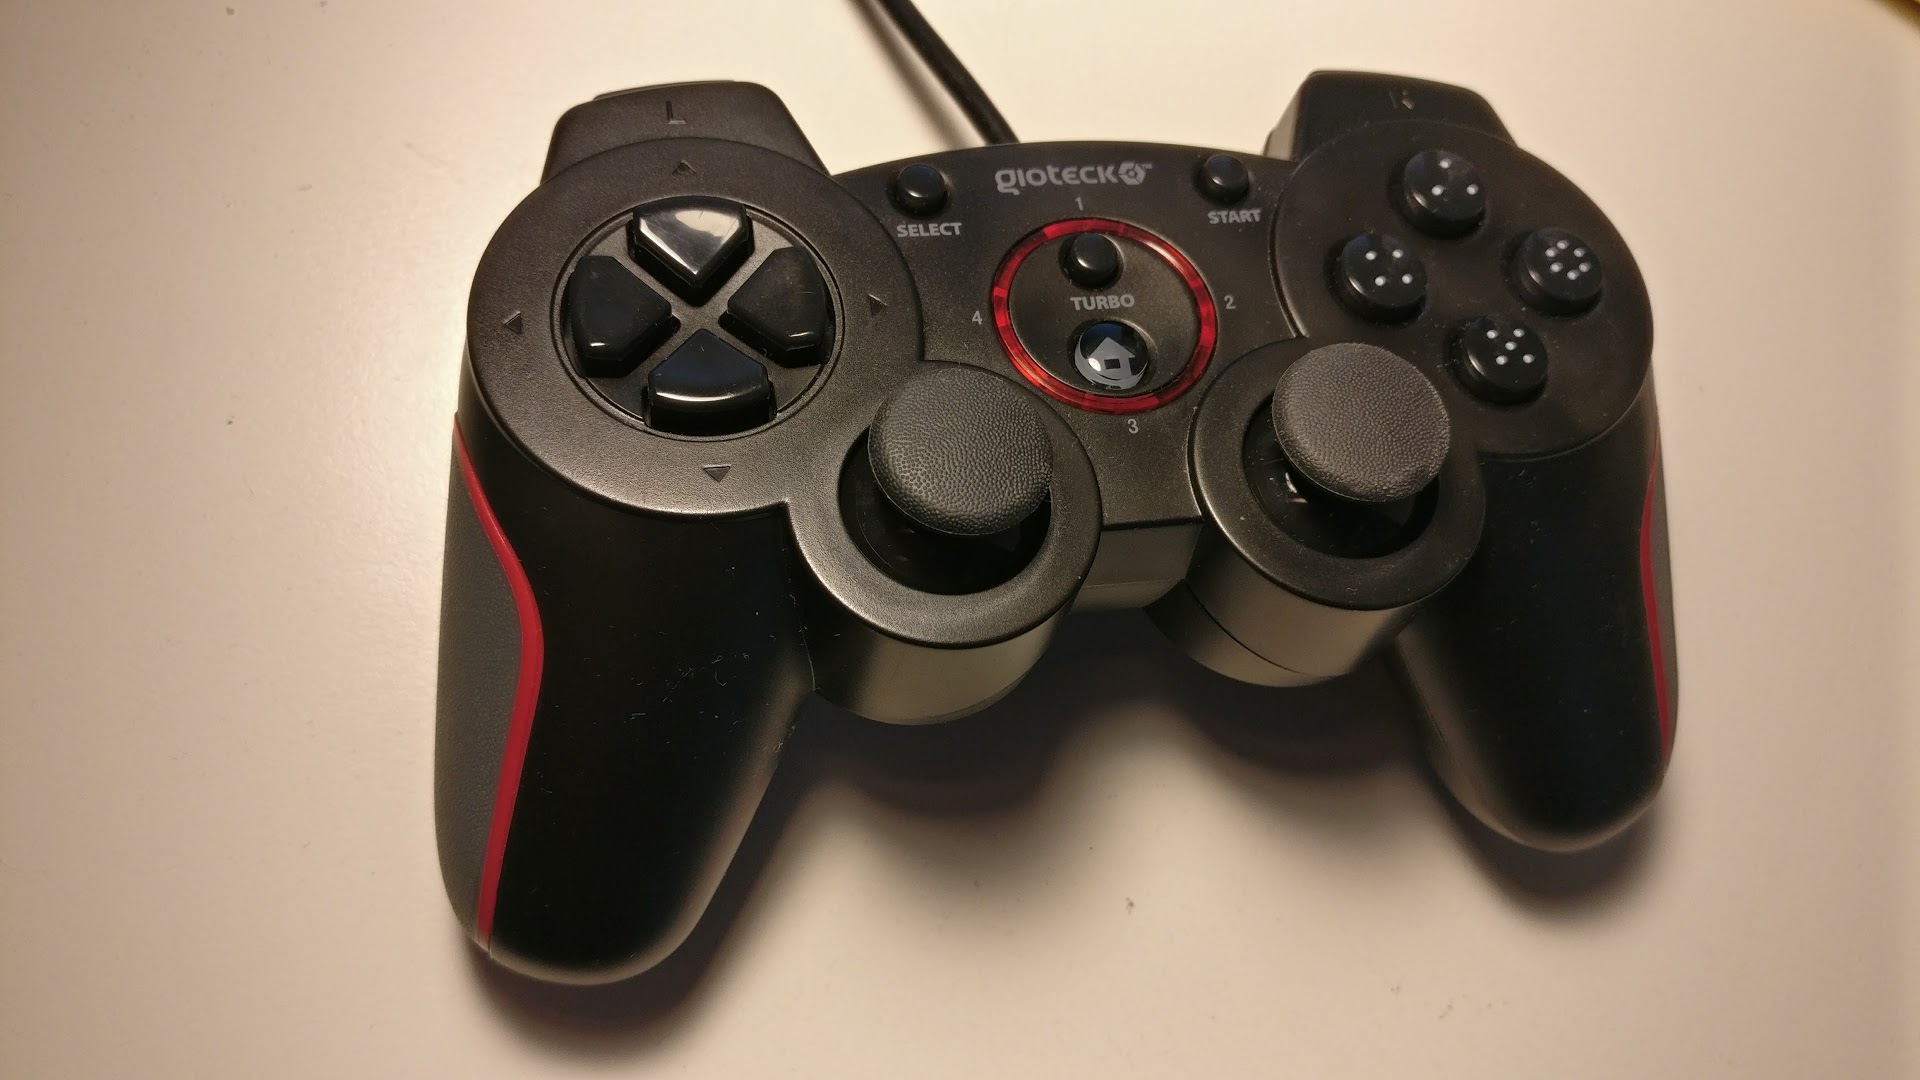
If you have PlayStation 3 compatible USB gamepad, you can use it with TSC. For example, I use this gamepad.
Goodbetterbest Ltd Gioteck VX2 Wired Controller
2) Download USB image file
tsc-usb-2018-06-17.img.gz - 2.4 GB
SHA256SUM:
dd6b64ac6b5f31c8f2783d8542f7d4cc1d39a9d0b3257513e09e68cc294ba2cc
3) Writing image to USB stick
Download Etcher - Win/Mac/Linux
Start Etcher, select image file, and write to USB stick.
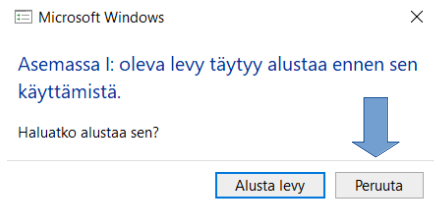
4) Do not format stick in Windows. It will make stick empty. Click Peruuta/Cancel.
5) Booting from USB
Booting from USB is usually done by pressing Esc many times when computer is booting. From boot menu select USB drive with arrow keys down and Enter.
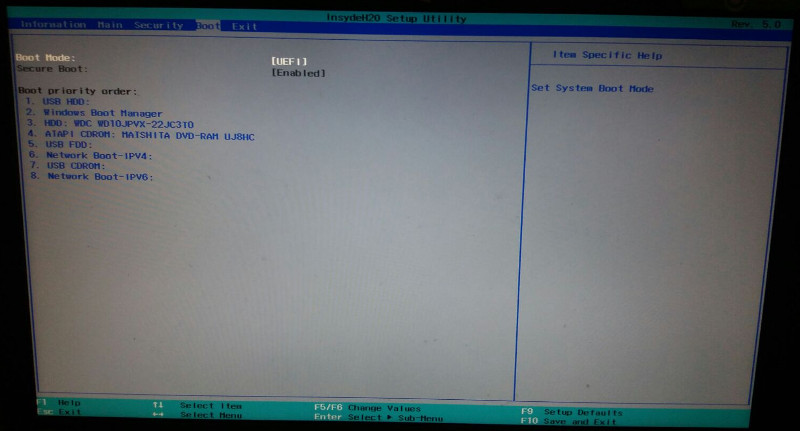
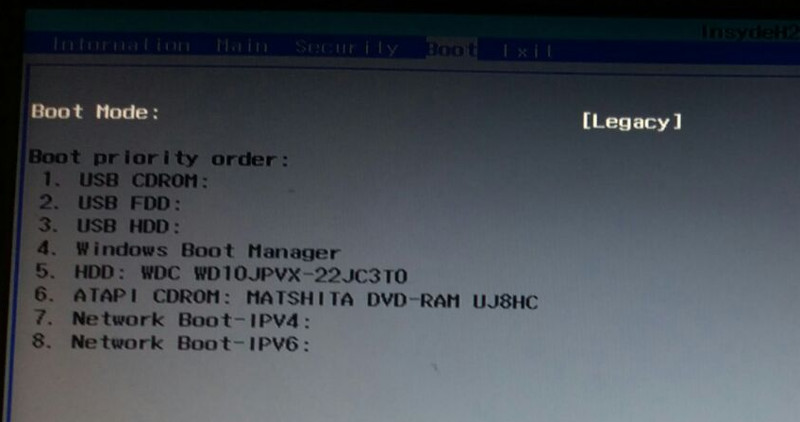
In one laptop’s case pressing F2 many times while booting did start BIOS/UEFI settings. There arrow key right to Boot menu, and on UEFI setting press Enter some times to accept OK messages, so that it is changed UEFI => Legacy Mode. After that orderl all USB boot options to top, and F10 is Save and Exit. Then it boots from USB stick.
6) Before: UEFI mode
7) After: Legacy Mode, USB options moved to top. Press F10 that is Save and Exit.
Alternative ways to boot from USB
Other alternative boot menu keys are F1 or Enter, that usually brings BIOS or UEFI settings where boot order can be changed. Some laptop models have some special tiny pushable button at left side of laptop, that brings settings menu. It could also be some other key, like F2, F10, F11 or F12.
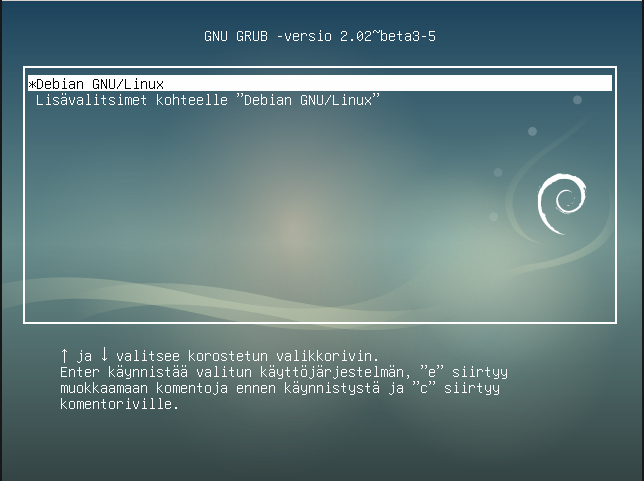
8) Linux booting from USB: press enter, or wait some seconds to continue booting
9) Enable firewall, because SSH server remote access is running by default
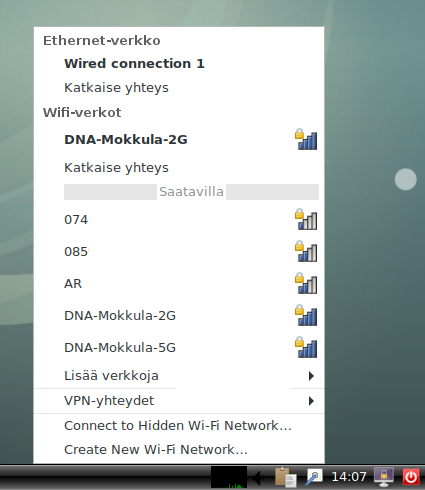
You can see Linux IP address with right click at bottom right corner icon that has blue wire in white wall socket, and then click “Tietoja”.
Linux has remote SSH access with:
ssh peli@192.x.x.x
ssh password: peli
sudo password: peli
Enable firewall to prevent remote access:
Click Start-Bird-menu / Järjestelmätyökalut / LXTerminal
Write and then press enter:
sudo ufw enable
If you want SSH remote access
Click Start-Bird-menu / Järjestelmätyökalut / LXTerminal
Write and then press enter:
sudo ufw disable
10) Network settings
You can test network connection with Start-Bird-button / Internet / Firefox. Write there some web address.
LAN: If you have Ethernet cable connected, it should connect to Internet automatically.
WLAN: Click at bottom right corner icon that has blue wire in white wall socket. Select WLAN network and enter your WLAN password.
Android mobile phone or table USB cable: connect USB cable from mobile Android phone to laptop. In Android phone click Settings cogwheel / More / Shared connection and mobile hotspot / Internet sharing via USB . If it does not connect yet, you may need to set mobile connection on desktop bottom right corner icon that has blue wire in white wall socket. You may need to click cancel to file manage popups that try to connect to your mobile phone disk space.
Symbian phone USB cable: connect USB cable to your computer and select Nokia Suite mode on your Symbian phone. If it does not connect yet, you may need to set mobile connection on desktop bottom right corner icon that has blue wire in white wall socket. You may need to click cancel to file manage popups that try to connect to your mobile phone disk space.
USB 2G/3G/4G/5G modem: connect modem to computer. If it does not connect yet, you may need to set mobile connection on desktop bottom right corner icon that has blue wire in white wall socket. You may need to click cancel to file manage popups that try to connect to your mobile phone disk space.
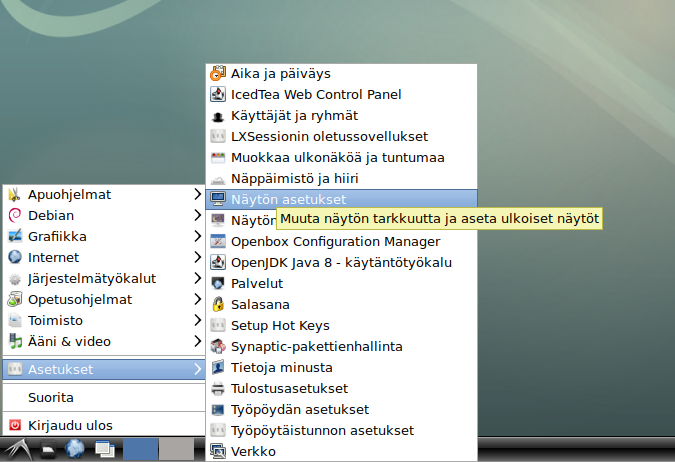
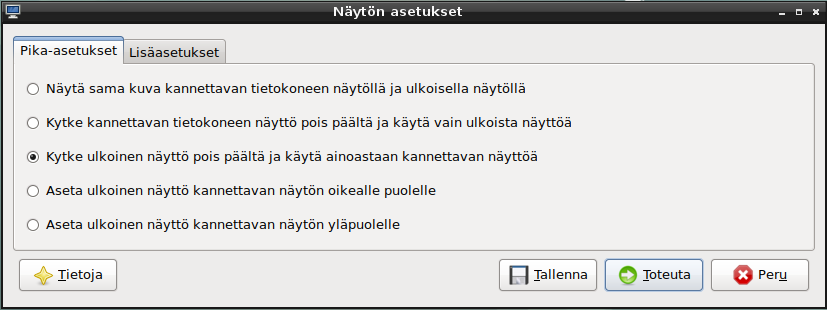
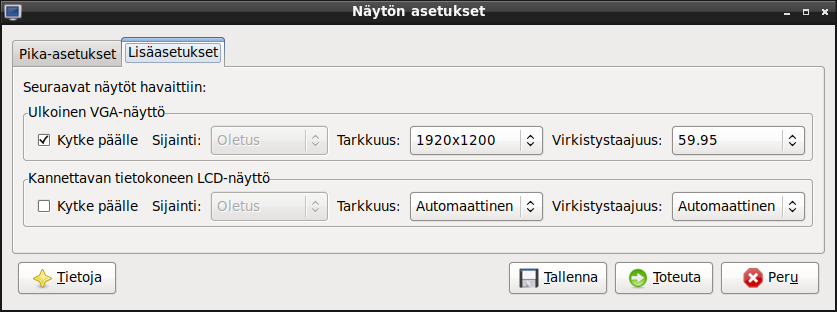
11) Screenmode
Click Bird-Start-button / Asetukset / Näytön asetukset. Select laptop local display, or external monitor “Ulkoinen näyttö”, or just try various options.
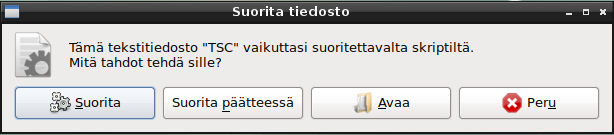
12) Starting TSC: Double click TSC shortcut at desktop and click “Suorita”.
This runs script that starts the game.
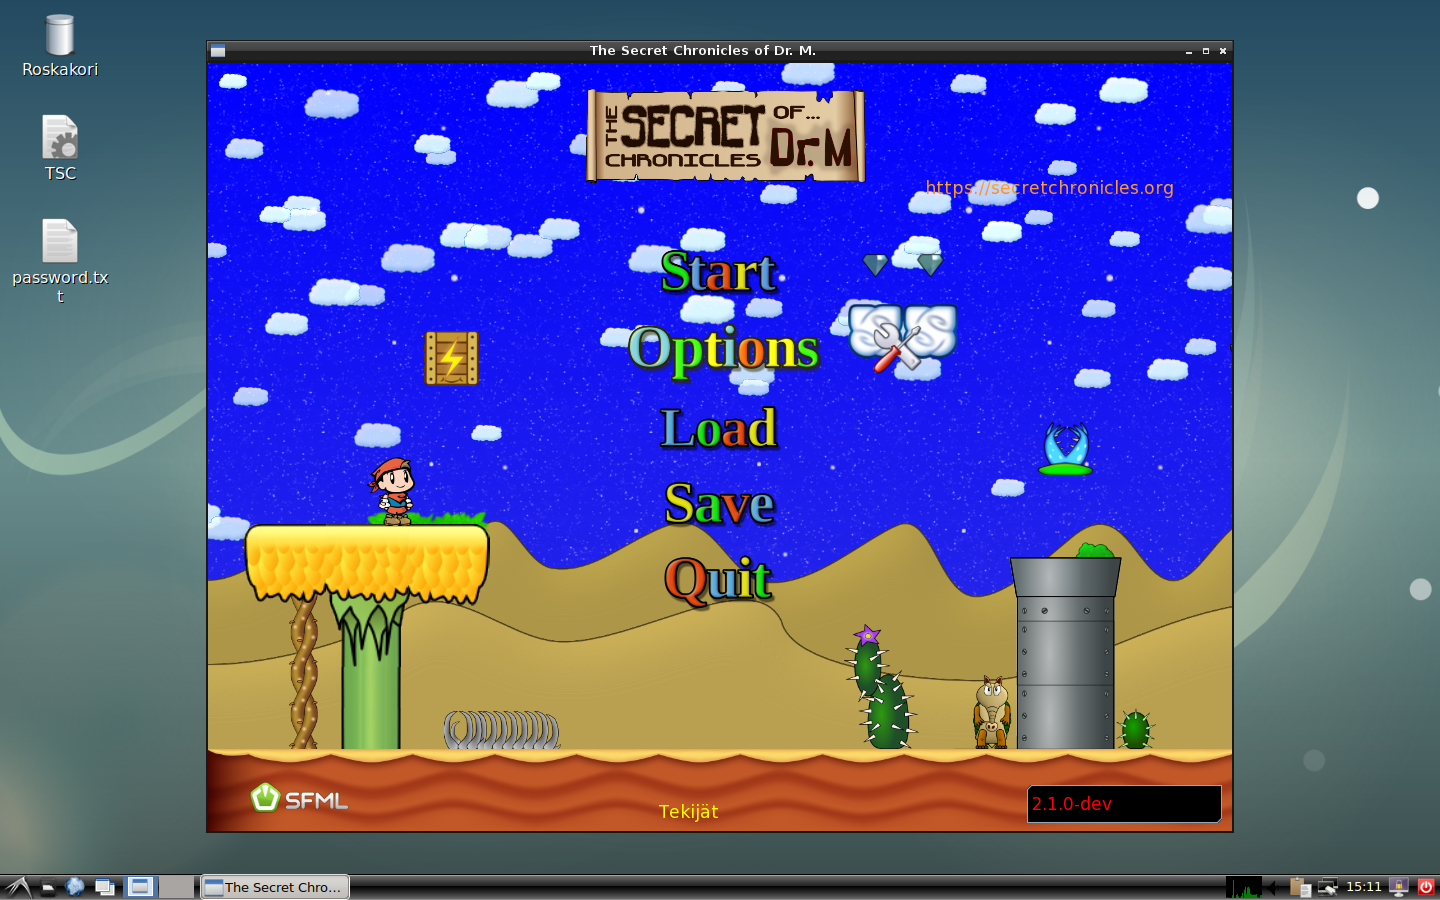
13) Main menu. You can move with mouse or arrow keys.
14) In Options, you can change gamepad settings.

15) Stopping TSC: press Esc, and click Quit with mouse or arrow keys and Enter.
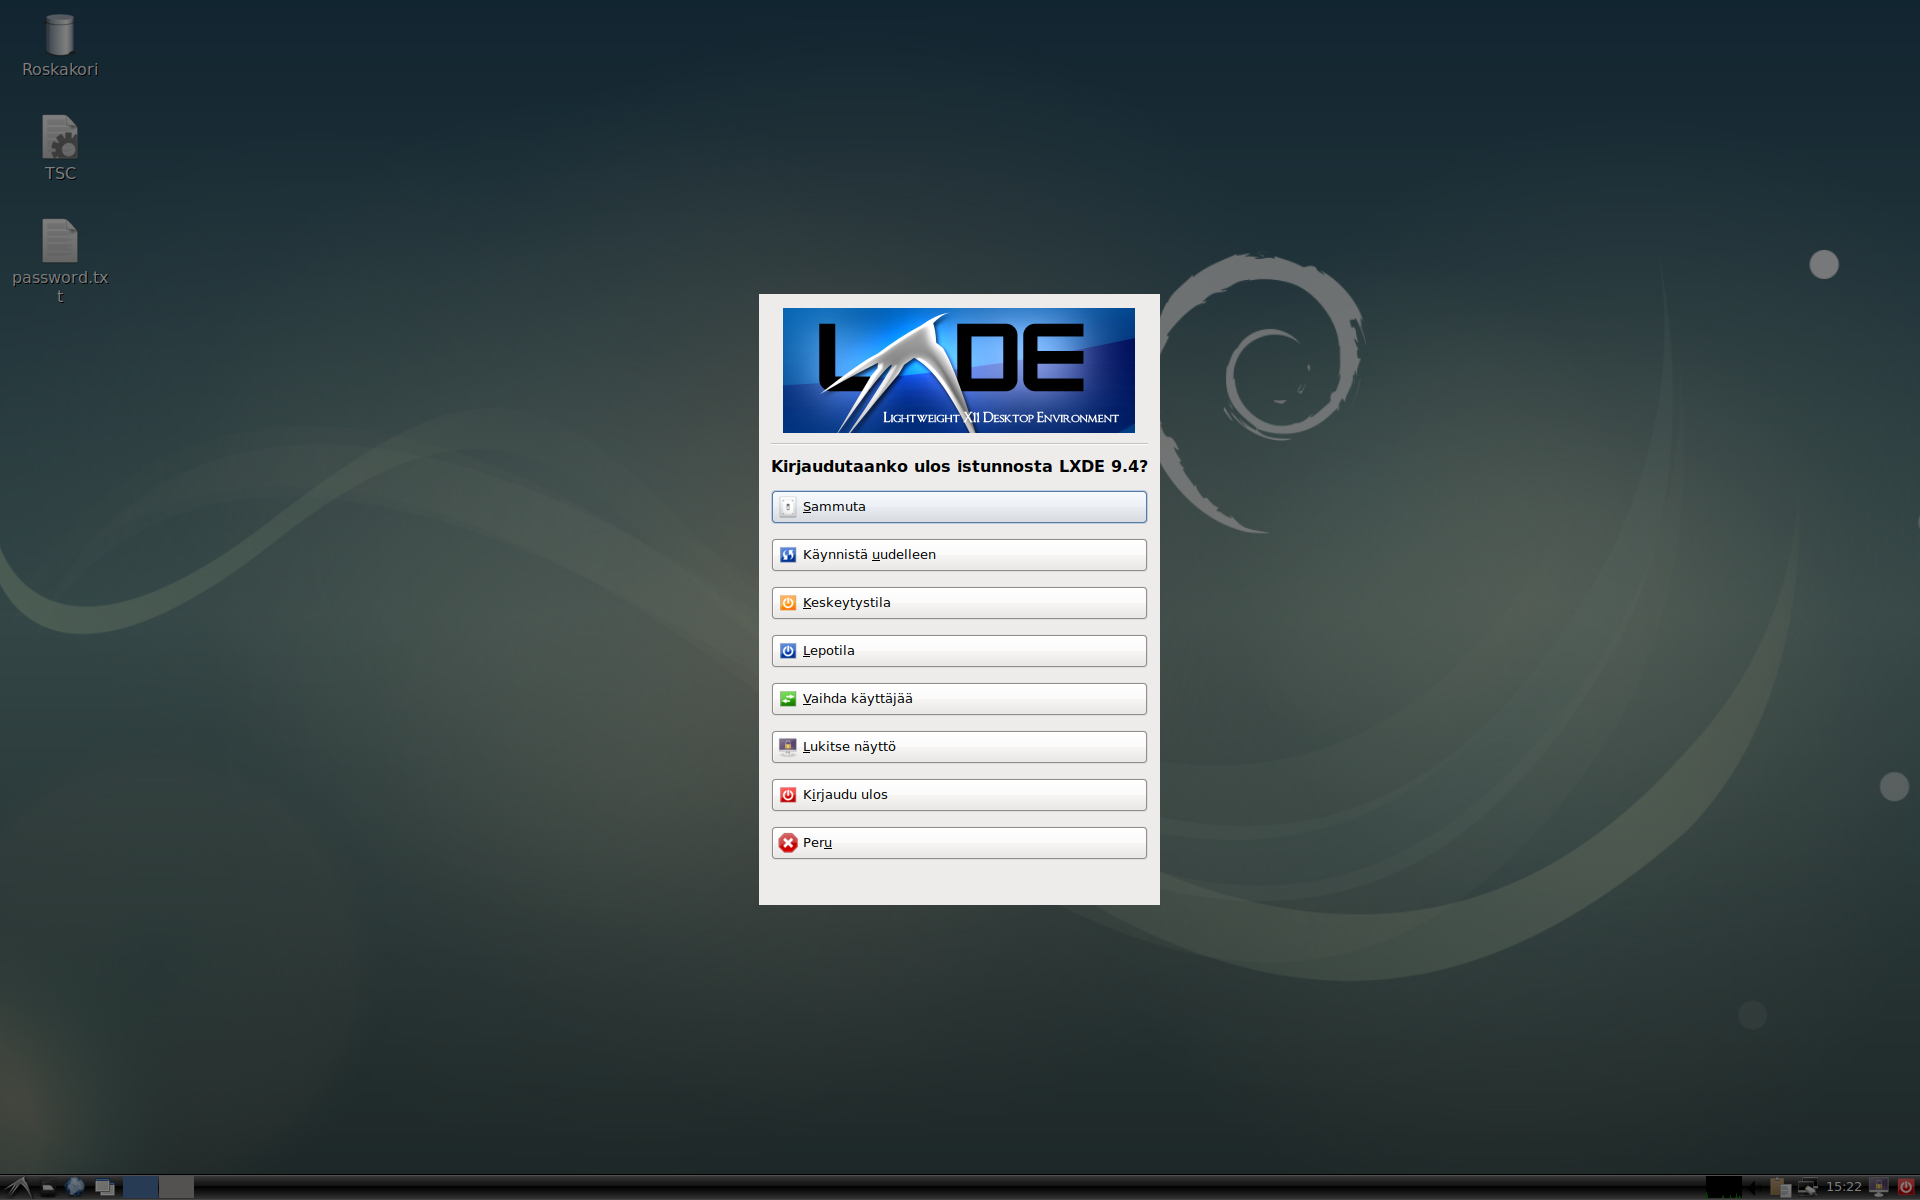
16) Shutdown Linux: Click Start-Bird-Menu / Kirjaudu ulos / Sammuta
17) Going back to Windows
To get back to Windows, change back Legacy Mode => UEFI.
Optional: Install Linux security etc updates
Click Bird-Start-button / Järjestelmätyökalut / LXTerminal.
Write this and press enter (password is peli) :
sudo apt update && sudo apt -y dist-upgrade
After updates, reboot Linux: Click Bird-Start-button / Kirjaudu ulos / Käynnistä uudelleen.
After reboot, cleanup to free space:
Click Bird-Start-button / Järjestelmätyökalut / LXTerminal.
Write this and press enter after each line (password is peli) :
sudo apt clean && sudo apt autoclean && sudo apt autoremove
exit
Optional: Update TSC to newest version.
Click Bird-Start-button / Järjestelmätyökalut / LXTerminal.
Write this and press enter after each line (password is peli) :
cd /home/peli/repos/Secretchronicles/TSC
git pull
./build-and-run.sh
exit
Optional: Change Language
Because this bootable USB was originally created for friend at Finland, desktop and keyboard is currently using Finnish, you can change language.
TSC game language is also in Finnish, you can change it after starting TSC game from desktop TSC shortcut in game options “Kieli: fi-fi, etc.”
Optional: Enlarge Disk Space
There is 7.5 GB / btrfs partition and 0.5 GB swap partition. If you write this to bigger USB stick, you can with GParted (for example Puppy Linux .iso booted in VirtualBox, and USB stick attached) delete swap and extended partitions, enlarge / partition to bigger, and add extended and swap partition. Then copy from GParted swap partition info the swap partition UUID to / partition textfile /etc/fstab editing it as root, replace old UUID, save /etc/fstab textfile, unmount USB stick, and boot from USB stick.
There is also experimental btrfs driver for Windows.
Development: Adding changes to USB image file
If you want to use Linux image in VirtualBox for development (it’s too slow for playing in VirtualBox), you can extract it unar, that unarhives any archive:
sudo apt install unar zip unzip p7zip-full xmount
Then you can mount .img as VirtualBox vdi file with xmount that writes changes to separate cache file, start VirtualBox as root with:
sudo virtualbox
Install VirtualBox extensions pack downloaded from virtualbox.org in VirtualBox menu File / Preferences / Extensions, make new Debian 9 64bit VM with 2 GB RAM or more, use /mnt/tsc…vdi as hard disk, etc:
unar tsc-usb-*.img.gz
sudo xmount --in raw ./tsc-usb-2018-06-16.img --out vdi --cache ./disk.cache /mnt
After changes to disk.cache file, writing modified disk image back to archived file requires having another harddisk vdi image, that you boot in virtualbox:
sudo mkdir /mnt2
sudo xmount --in raw ./tsc-usb-2018-06-16.img --out vdi --cache ./disk2.cache /mnt2
Then create new VirtualBox Debian 9 64bit VM with 2 GB RAM minimum, add to SATA controller, add to it harddisk drive /mnt2/tsc…vdi , then add cdrom and leave it empty, then add harddisk drive /mnt/tsc…vdi . Then add shared folder with auto-mount. Start VM. Click Start-Bird-button / Järjestelmätyökalut / Tiedostonallinta that is file manager. Click on file manager Linux partition at bottom, to see is it /dev/sdb. Install VirtualBox additions from top VirtualBox top menu. Then unmount /dev/sdb and make archive on Start-Bird-button / Järjestelmätyökalut / LXTerminal:
sudo su
See what shared drives there are:
df -h
And write disk image:
sudo dd if=/dev/sdb conv=sync,noerror status=progress | gzip -c > /YOUR-SHARED-FOLDER/tsc-usb-YEAR-MONTH-DATE.img.gz
Lauri (xet7)
On behalf of TSC team